At JTAPE, we’re well-versed in the difficulties faced by body shop professionals when it comes to masking off certain areas for repairs and spray painting. Some of the most troublesome areas are often the A, B and C-posts of vehicles. Here, we’ll give our top tips for masking around these areas, alongside giving you our top JTAPE product recommendation for the job.
Tapes for Masking Posts & Pillars
Masking posts and pillars on a vehicle can often be a hard task because the gaps are usually small and difficult to apply the tape to. However, with our years of expertise, we’ve created a range of innovative solutions perfect for this use.
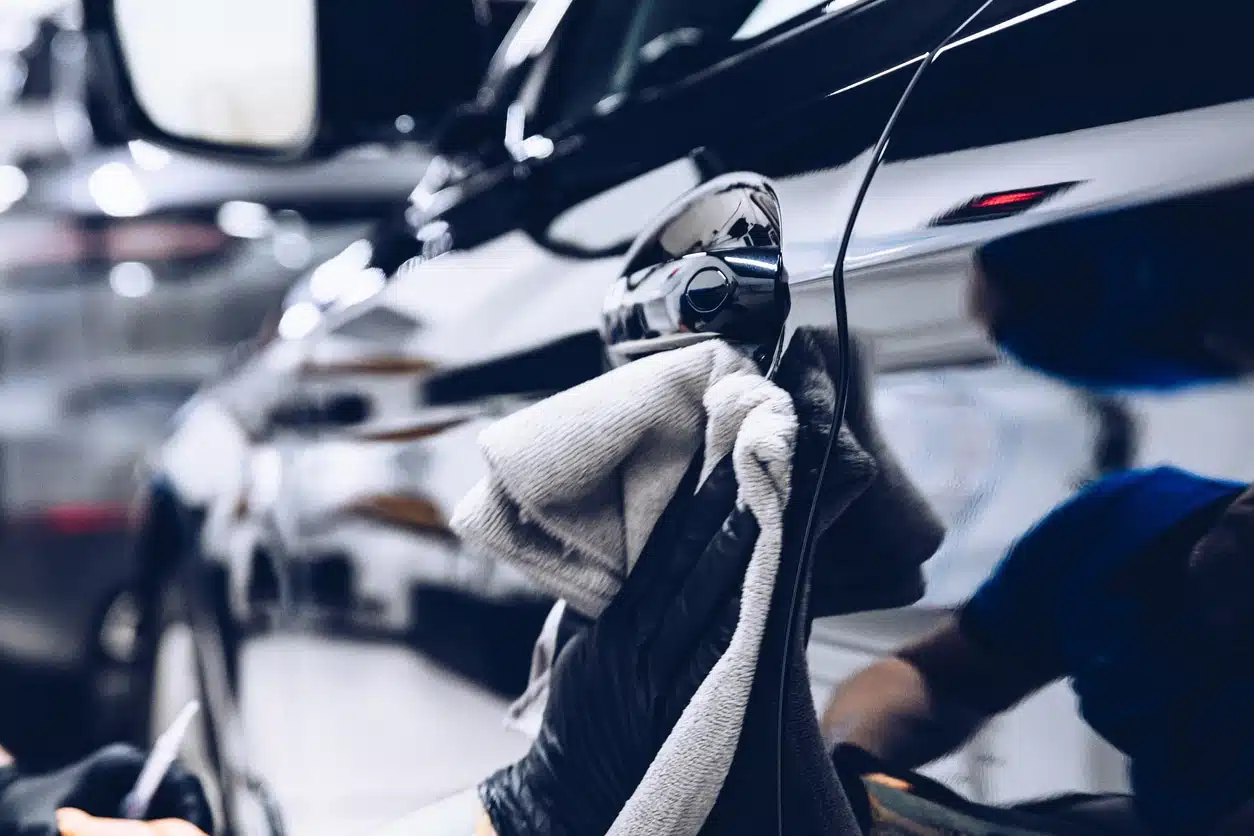
Our T-TAPE Foam Masking Tape is the ideal solution for use with B & C pillars, specifically designed for aperture masking on the inner surfaces of vehicle access points. Its unique T-shape design creates a feathered finish, eliminating paint build up and its flexible closed cell foam means it’s conformable and easier to manipulate around tight vehicle contours.
Our Advanced Foam Masking Tape is perfect for masking in the tricky gaps of A, B and C pillars. This tape is easy to adjust, simple to apply using the offset adhesive and highly flexible to the vehicle’s intricacies. The Advanced Foam Masking Tape also benefits from temperature resistance up to 90°C/194°F, allowing it to be suitable for use in low-bake ovens. With the help of this tape, body shop professionals can achieve a high-quality finish for their customers while also saving time and money.
With this tape, you’ll achieve a blended edge rather than creating harsh lines which will help any reworking blend in with old work.
Click here for our full range of JTAPE Foam Tapes.
What is a Pillar in a Car? Different Pillars Explained
The main purpose of car pillars is to provide a strong and sturdy structure for vehicles. These pillars are labelled differently depending on their location in the vehicle’s body and most often appear in the shape of a letter.
Below, we’ll explain each one and the key differences to help you fully understand where each one is and why they might require different masking techniques.
A-Pillar
The A-posts can be found on the passenger and driver’s sides of the vehicle. Their purpose is to hold the two side edges of the car windscreen and ensure the car meets the latest safety standards. While these pillars are often an annoyance to drivers because they create blind spots, they’ve been added to protect the driver and any passengers as best as possible in the event of a collision or other road traffic accident. In recent years, the post size has been decreased to increase driver visibility while still maintaining the highest level of safety possible. This has resulted in much smaller posts that are more intricate to work on.
These posts are often manufactured using strong steel since this is the most durable material. However, repairs can often be costly for these pillars because of the hard materials and additional time needed to work on the refinishing.
B-Pillar
The B pillar is arguably the most complex. Shaped like the letter ‘B’, this is located where the rear door hinge meets the part of the front door that closes closest to the back doors. This is also typically manufactured using steel and is often welded to the roof panel in the middle of the car, while also being welded to the floor pan at the bottom. The main purpose of the B post is to support the roof of the vehicle.
C-Pillar
Finally, the C pillar sits behind the rear door in a ‘C’ shape. While the shape and size of this will vary more than the other pillars depending on what type of vehicle you’re dealing with, it will usually always be found in relatively the same part of the car. From smaller hatchbacks to estate cars, you’ll always find it behind the back window to protect the back seats and any passengers should there be an accident at the rear of the vehicle.
Masking Car Pillars
The task of masking car pillars is made much simpler with the help of our Advanced Foam Masking Tape. And although each pillar is different, they require very similar masking techniques. If you’re unsure of how to apply your foam masking tape in these gaps, the steps below should help you get to grips with the best methods to use.
Step 1: Assess the damage
Regardless of whether you’re working on the A-pillar or the C-pillar, these pillars are there for safety reasons. If the damage to the areas is severe enough for you to consider replacing them, then this is usually the best course of action moving forward. So before you think about refinishing the vehicle’s surface, decide whether to replace parts or all of the pillars.
Working on these areas is tricky because they can’t be changed too much. For example, over sanding the pillars could reduce their effectiveness, which could be dangerous for the vehicle owner and their passengers.
Step 2: Apply the tape
You might have previously found that applying tape in the gaps between the doors and the pillars can be time-consuming and awkward to get right. But with our Advanced Foam Masking Tape and its offset adhesive, you can easily apply the sticky side to the back edge of the fixed part and adjust it accordingly.
When it comes to applying Advanced Foam Masking Tape, you always apply it to the moving part, other than on the A-post when you apply it to the fixed part, typically the fender.
To make this slightly easier, it’s usually helpful to open the front doors slightly. This creates a bigger gap for you to work in. Once the tape has been attached and the non-adhesive side is still visible on the outside, you can apply pressure and close the door.
This method can easily be used for the B and C posts, although the only difference is that when you’re masking around the underneath of the window for the B-post, the door doesn’t need to be open.
Step 3: Adjust the tape back
The final step is to adjust the tape back. Adjusting the tape back is a very important step and shouldn’t be missed if you want to achieve the best paint finish.
To do this, push the non-adhesive edge of the foam tape into the gap before going ahead and painting your base coat. You can then step the tape back with a piece of card or spreader. This means your clear coat will bleed over the edge of your base coat, resulting in no hard paint line.
Whichever pillars you’re masking off, we hope this guide helps you get the job done quickly and efficiently while also achieving the perfect paint finish on the vehicle. To discover our full range of tapes and films designed to make your job easier as a body shop professional, check out our product page.