Using Fine Line Masking Tape for Lettering: How-to Guide
Achieving clean lines for fine details like lettering on vehicles can be tricky, even for the most experienced professionals. While some might opt for pre-made lettering to help them get the job done, it’s possible to paint lettering to a high standard using fine line masking tape. In many cases, this can provide a better, longer-lasting finish than vinyl decals, for example.
This useful how-to guide is here to help you become a lettering pro. We’ll take you through our recommended tape products, the different types of lettering jobs they’re suited to and our tips for pulling off a professional quality lettering paint job.
Best Tapes for Lettering
Curious about which of our tapes are best suited for lettering? Discover the best JTAPE products to use below.
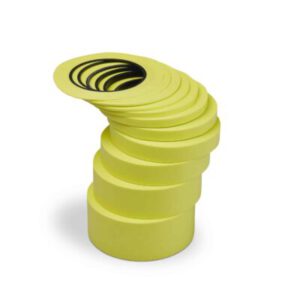
Lime Precision Masking Tape

Our 120C Lime Precision Masking Tape is a translucent rice paper masking tape, and is higher tack than other similar tapes. With its acrylic adhesive, it’s best suited for highly protective bonds on sensitive surfaces and can be removed with no adhesive reside, ensuring you achieve a clean, great-quality finish without paint bleeding under the tape.
Fine Line Masking Tapes
Each of our Fine Line Masking Tapes is perfect for hand-painting straight and curved lines onto the surface of a vehicle. Our Purple Translucent Fine Line Masking Tape is highly flexible, with a newly formulated translucent backing, while our blue, green and orange fine line masking tapes are medium flex, allowing you to perfect all the lines during the lettering process. Whether you need a thin or thick masking tape, a wide variety of tape widths is available to ensure you find the one that’s right for your job.
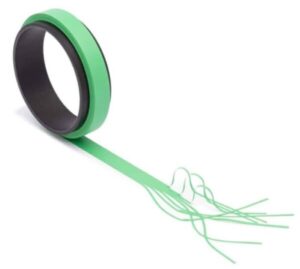
Customising Tape

Our customising tape is split into eight 1.5mm strips so that you can easily apply even sections of tape. This solution is perfect for those that don’t have a steady hand and want to save time preparing their tape pieces before beginning the lettering process. It can also be handy to use when you need to peel out the central section of the lettering.
Different Automotive Lettering Jobs
Offering lettering in your body shop can be appealing for a variety of different customers, from petrolheads wanting to add something unique to their car to motorbike enthusiasts asking for lettering on their bikes or helmets. You might even find that other businesses start coming to you for unique advertisement signs on their business vehicles.
How to Do Lettering with Fine Line Masking Tape
A slightly different approach will be needed depending on whether you’re only lettering using straight lines or incorporating curves. In this section of our guide, we’ll explain how you can tackle these different methods.
Straight lines
Achieving straight lines is arguably easier than trying to perfect curved lettering, simply because you can easily measure everything and ensure your spacing is correct with less effort. The following steps should be followed to achieve perfect painted lettering each and every time.
Prep the surface
The first step is to prepare the car and ensure the surface is ready to be painted. This will usually involve carrying out any body repairs before priming, block sanding and final sanding. The last thing to do is clean the surface, paying close attention to the area where the lettering will be to ensure it’s free of debris or dirt.
Apply primer sealer and base coat to the area
Before you start painting the lettering, you’ll need to apply primer sealer and a few coats of base coat to the surface. This will act as a protective barrier if you need to remove any lettering and start again later down the line. Allow this to dry fully before moving on.
Measure and map out the lettering shapes
Working with your customer’s requirements, you can then start to measure and map out the sizing and spacing for your lettering shapes. This will be entirely unique to the job and could involve mapping out fine line or thicker lettering depending on what the customer wants and the part of the vehicle you’re working on.
Place the tape to mask the design accordingly or make a stencil
Once you’re happy with the mapped-out design, you can begin placing your masking tape down onto the car’s surface. Using either a razor or a pair of scissors, cut each strip of tape needed according to the design. Ensure everything is pressed down before starting the painting process since this will prevent paint from bleeding into the edges of the tape.
Remove the tape
After painting the lettering with your choice of automotive paint, you can carefully remove your fine line masking tape. This should then be sealed in with a clear coat or two to give it a professional finish.
Curved lines
With curved lines, there’s definitely more to think about. But that doesn’t mean you can’t achieve crisp edges on your curved paint lines.
Using our medium flex fine line masking tapes, you can apply tape to create the desired curved stencil ready to paint onto the surface of the vehicle. While it might take more time to apply your tape, the flexibility of our range makes this process much easier for more unique lettering requirements.
We hope this guide provides you with a handy resource to help you perfect your lettering and custom paint techniques. To learn more about our excellent range of tapes here at JTAPE, To learn more about our excellent range of tapes here at JTAPE, head to our product page.


